How To Apply a Simple Everyday Makeup Look
DISCLOSURE: This post may contain affiliate links. This means I may earn compensation when you purchase any products through these links at no additional cost to you. Please read the full Disclaimer Policy for details.
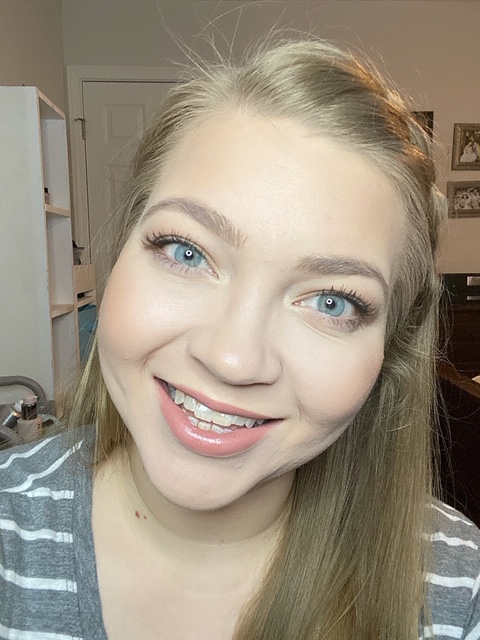
Hey beauties! I wanted to share a quick and easy makeup routine that’s great for everyday – whether you’re a stay at home mom, working woman, student, or a little bit of it all. This is what I have loved doing lately to feel put together but doesn’t take me longer than 10-15 minutes!
Table of Contents

Before we jump into makeup...
You should always start with a solid skin care routine before putting on your makeup. Not sure where to start? Check out this post on How To Start a Simple Skin Care Routine. At the very least, your skin should be cleansed and moisturized prior to starting any makeup routine.
Some of these steps, you may want to skip – that is totally fine! Adjust this to your personal preference and with your own products.
Prep & Prime
Prep Facial Spray
I’ve been using a Reviving Facial Spray for awhile now that helps close pores, hydrate the skin, and as a bonus it has caffeine in it that wakes me up! I also use this throughout the day when I need extra hydration or just to freshen up. Unfortunately, it was a limited edition item (and fortunately, I stocked up before they sold out) but it was collaborated with Skindinavia. The Makeup Primer Spray by Skindinavia seems very similar to what I’m currently using.
How to apply: spray all over face (X and T motion). Do not forget to apply to your neck as well.
Prime your skin
Next, go in with a foundation primer. The purpose of a primer is to act as a velcro underneath your makeup to help keep it from moving throughout the day. I always use a primer on myself and as a makeup artist, I apply it to my clients as well. Some primers have a tint to it that will help blur fine lines, wrinkles, and help minimize the appearance of pores. Others hydrate or help with oil-control. There are so many options out there, you just have to find the right one for you. And if you have a combination of needs – use different primers for each area!
How to apply: Using your fingers, apply all over and gently press the product into your skin (especially if you have textured skin – dry patches, pores, acne scarring, etc). This will ensure the product really gets in all those areas. You can apply with a brush or sponge but I have found it works best to apply it with my hands. Apply this onto your neck as well.
Tip: For textured areas (acne, dry spots, etc), press the primer into your skin instead of just rubbing it onto your skin.
Complexion
Foundation
Whether your a minimum or a maximum coverage kinda girl – foundation is an amazing tool. Not only can it help cover any redness, breakouts, age spots, or just even out your skin tone overall – it also protects your skin. Think of how dirty your sunglasses get from environmental factors – the same stuff goes on your face! So instead of all that dirt and gunk going onto your skin and into your pores, it goes onto your foundation and then you wash off your foundation at night! Be sure your foundation is non-comodegenic (meaning it won’t clog your pores).
How to apply: I personally love using a damp beauty blender to apply my foundation for a more natural look. If I didn’t have one or wanted a more full coverage, I would use a paddle type brush.
Tip: Focus on the center of your face then work the foundation onto the outer portions of your face. Also, bring your foundation down your neck. Your neck tends to be the lightest part so we do not want a harsh line.
Concealer
To conceal – use a shade the same shade as your skin to hide any blemishes, redness, or dark spots. Many people think they need to go lighter to hide “imperfections”. Going lighter will only cause them to stick out more!
To highlight – use one to two shades lighter than your foundation shade to highlight the face.
How to conceal: It depends on the coverage I want but I’ll use a beauty blender, my ring finger, or a dense brush like this precision brush. For more full coverage, a dense brush does a great job. Apply dots of concealer on any dark spots, blemishes, or any other area you want to even out with the rest of your face. Blend well.
How to highlight – I use a lighter shade of Ivory (my foundation is a mid ivory shade) to highlight under my eyes, the bridge of my nose, cupids bow, and forehead. I also apply this to my eyelids to brighten my eyelids and it acts as a primer for my eyeshadow as well. I prefer to use a beauty blender to blend it all out.
Set with powder
I personally love using a translucent powder to set my foundation and concealer. It doesn’t add any color on top of what I’ve already applied but will set everything in place to prevent creasing or moving. I have oily skin so the translucent powder I use also helps with oil-control. You could use a tinted loose or pressed powder as well. I keep a pressed powder with me if i need any touch ups throughout the day.
How to Apply: A big fluffy brush. Press the powder into your skin rather than sweeping it. Sweeping the powder will cause the foundation and concealer to move. After you press the powder into your skin, lightly dust off any excess. Something like this powder brush would work great!
Tip: Try to use a small amount of powder and only in areas you need it – packing it on will only accentuate fine lines, cause creasing, and make the skin look dry.
Contour/Bronzer
I like to finish the remainder of my face before I move onto my brows & eyes. So I grab my powder contour shade or a bronzer to add some color and structure to my face. With contour shades, they tend to be matte and brown shades with grey/cool undertones. Contour is used to create shadows along the outer parts of your face. Where bronzers tend to have a slight shimmer and warmer undertones to make you look sun-kissed like you’ve been vacationing in Hawaii.
How to Contour: Using precise motions, apply contour on your temples, underneath your cheekbones (in the hollow), and along your jawline. To go one step further: apply contour along the sides of your nose and in the dip on your chin underneath your bottom lip.
You can use powder or a cream shade to contour. For beginners, I highly suggest a powder. It’s a little more forgiving than a cream. If you’re more advanced, try out a cream! Just apply it before you use your setting powder. Use a dome shaped or angled brush. Something like this angled contour brush.
How to Bronze: Bronzer is not meant to go everywhere – it is meant to go where the sun naturally hits. Think of it as applying in a number 3 shape. The three spots to hit are your forehead, cheekbones, and jawline. And then connect all three of those by bringing your bronzer in between. Use a fluffy powder brush to apply. Something like this powder brush would work great.
Blush
Next we add some color to our cheeks. I love using a nude shade with a hint of pink. It’s just enough color for everyday! You can definitely have fun with blush and change it based on what looks best on you and your skin tone.
How to Apply: Simply apply the cheek color to the apples of your cheek and blend across your cheek bone. There are ways to apply based on your face shape but since this is an everyday, natural makeup look, a quick sweep across your apples and cheek bone is perfect. I like using an angled cheek brush similar to this angled contour brush.
Highlight
Next we add some highlight to the highest points on our face. This will reflect light and help add further shape/dimension to your face (like contouring/bronzing does).
How to Apply: I like to apply this to my cheek bones, cupids bow (above top lip in the center), inner corners of my eyes, on my brow bone underneath brows, and the tip of my nose. Any leftover I have on my brush, I’ll apply to the center of my chin and on my temples. We do not need to apply it heavily like we often see – use a light hand and softly apply. I apply this with the top portion of my angled cheek brush. You could use a big fluffy eye blending brush. You’ll see people using fan brushes but I’m personally not a fan (pun intended).
Tip: If you have dryer skin, a liquid highlighter is best. Powders can settle into dryer areas and fine lines/wrinkles.
Brows & Eyes
Brows
Brows make your whole face. I love a good natural looking brow with a little shape. If you don’t want a harsh or really defined brow, grab an eyeshadow the same tone as your brows or a fine tipped brow pencil to fill in your brows. The key is to make small hair-like strokes to make it look natural. Then I top it with a brow tint. This will keep your brows in place all day and most give some volume to your brows as well. Depending on your brow needs, you might not need to do much. Maybe a little brow gel to hold in place and your done. Mine need some help! I have sparse areas and they are very light so adding a little liner and tint really helps me look put together.
How to Apply: Brush brows upwards with a spoolie brow brush. Starting at the arch of your brow, apply the shadow or use the pencil to make small, short upward strokes to mimic your natural hairs. I start at the bottom of the brow and work throughout the arch to the tail of my brow. Then do the top of my arch and finish with the inner part of the brow. Remember that you want to the inner part of the brow to be very soft – you don’t want any harsh lines. Then apply brow tint/gel using upward strokes. I love a dual ended spoolie/eyeliner brush like the one above. I can use the eyeliner side when I use a shadow for my brows and it is easy to switch to the spoolie as I work on my brows.
Eyeshadow
For a natural glowy look, I love taking my bronzer and using it as my eyeshadow.
1. I love products that I can use in multiple ways.
2. I love the gold tint and warmth of my bronzer.
It looks so pretty on the eyes. To do this, I take the bronzer through my crease. I also like to take a to apply the bronzer along my lower lash line.
How to Apply: Take a fluffy crease brush with the bronzer on it and starting in the outer corner, sweep through your crease. I suggest keeping your eyes open when doing this so you can see where the shadow needs to be. To apply on the lower lash line, start on the outer corner with a small, dense, tapered brush and take it about 3/4 of the way leaving the inner 1/4 blank.
Tip: The first place you set your brush down on your face, is the place where most product is going to be.
Lashes
I always like to start with a lash primer. Lash primers are great for conditioning and strengthening the lashes for less breakage, easier removal at the end of the day, and they also give something for your mascara to stick so you won’t have your mascara flaking off halfway throughout the day. And if you werent convinced already that you need a lash primer, another benefit is when you pair this with your fav mascara, it will also help give you fuller, longer lashes. If you don”t have one, I highly suggest grabbing one to add in your makeup bag! Then add two coats of mascara on top!
How to Apply: Starting at the roots of your lashes, wiggle (to ensure you get every lash) and run through to the tip of your lashes. Two coats is best.
Tip: If you still have issues with your mascara falling throughout the day or smudging under your eyes (even after adding a lash primer), try using a waterproof mascara on your bottom lashes. You can also apply one coat to your top lashes as well.
Lips
Liner
I love adding liner before lipstick to help the lipstick stay on longer and to help prevent any bleeding. I typically use a nude liner similar to my natural lip color.
How to apply: Line lips and then fill in your entire lip. I have found this helps keep the lipstick have longer wear.
Lipstick
For an everyday look, I tend to grab a nude shade. My current favorite is Blush Velvet. Mostly because I go through a million shirts daily (acid reflux baby) and nude lips will match anything!
Lip Gloss
And to top it off – you may have guessed it – a nude lip gloss. Nude lips are a trend here! My all time favorite lip gloss, it’s literally the best, is Cafe Au Lait. Non-sticky, perfect nude/pink combo and its looks so good on every shade of skin.
To take this look up a notch:
Add a liquid highlighter to your foundation for an all over glow.
Use a cream/liquid contour prior to setting with powder. This will give your face even more dimension.
Deepen your eyes by applying a deeper brown shade on the outer corners.
Add a bold lip!
Final Thoughts
The great thing about makeup is that you can personalize it to you and your preferences. You can add or subtract from any of these steps to make it yours. Have fun with it! If you make a mistake, you can take it off and start over. If you’re a beginner and just learning the techniques, practice makes permanent. Keep practicing! And if you ever need help, feel free to reach out to me! Happy bronzing!


